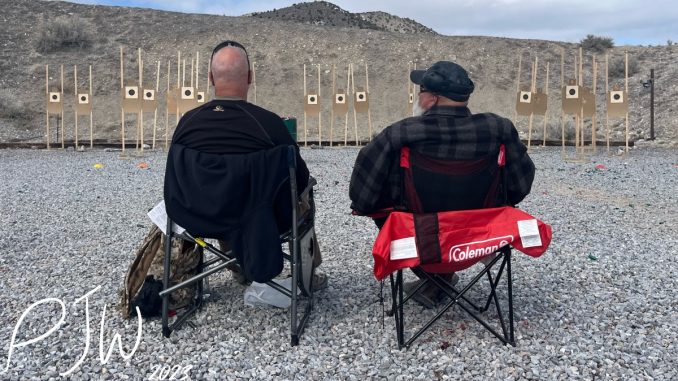
In Spring of 2023, Dan, Ally, and I took the NPE Counter Robbery class. Taught by Cecil Burch, Darryl Bolke, and Chuck Haggard, this 3 day class was extremely informative, and as such, I wanted to write an AAR. What can you expect to learn at NPE Counter Robbery, and how should you prepare?
NPE Counter Robbery Overview
Non-Permissive Environments (NPE) are areas in which weapon carriage needs to be extremely covert. They may be places where you’d lose a job, or go to jail for being caught with a weapon. Despite being areas in which weapons are non-permissible, crime can still happen. Covert ways to carry a weapon become the prime goal, and the NPE Counter Robbery class exists to prepare us for fighting in NPEs.
A full description of the class can be found here, but I’ll give a SparkNotes rundown. The class aims to give average folks a class, where they actually shoot the guns they carry, and get familiar with pre-conflict cues. The class also covers carry in NPEs, use of OC spray, and a coverage of Craig Douglas’s Managing Unknown Contacts (MUC). Flat range style shooting is modified for courses of fire that more so simulate the real world, where you cannot muzzle every potential threat. The class was hosted by The FARM, in Fairfield Utah.
The NPE Counter Robbery class was taught by Cecil Burch, Darryl Bolke, and Chuck Haggard. Cost was $475 for the class. Spread out over a night and two days, we had about 22 hours of learning that transpired over the weekend of March 31st – April 2. The three instructors have a wealth of knowledge and experiences, which certainly lead to an excellent class. Before we dive into the class itself, what gear did I bring, and what was the weather like?
NPE Counter Robbery Gear List
Everyone likes to hear about gear, so lets cover it! The gear list for the class wasn’t too intensive, essentially asking for a reliable small handgun with a quality holster, and a “blue gun” dummy gun. The class was billed as being 200 rounds or less, so I packed extra ammo to be safe.
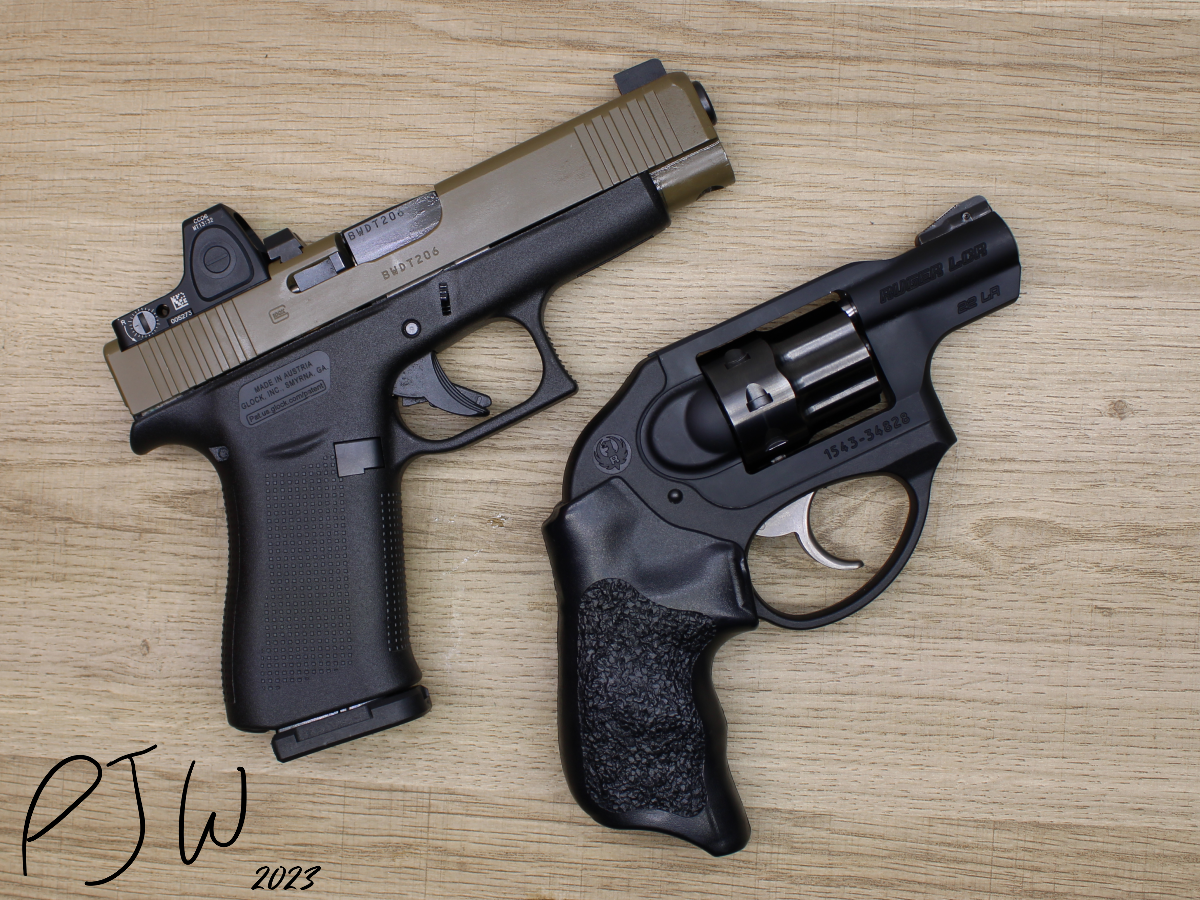
I generally carry two guns, so I brought the two that I would want to bring into an NPE, along with backups in the case that I had a mechanical failure that could not be fixed at the range.
While I normally carry a Glock 45 or 17, I decided to bring my 48 to the class. I carry 48 to gym, and it is a gun that is essentially invisible on my body. For my pocket gun, I decided on my LCR 22. This is a gun that I have shot a lot, and have carried a ton too. For holsters, I used the PHLster Skeleton for the 48, and a Galco Pocket Protector for the LCR. As my spare guns, I brought my Gen 2 Glock 17, and my Smith 442. During the course of the class, I did not need to rely on these guns.
For clothing, I wore my standard khaki slacks, and a good pair of boots. While it is springtime in Utah, the temperature varies wildly. As such, I wore good wool socks, and brought plenty of outer torso layers to stack and remove as the weather changed. Hot hands were packed in my kit, and were used every day too. I cycled through the various hoodies and fleece pullovers during the days, and I’m glad I packed them. Speaking of clothing, how was the weather?
Weather Conditions
As mentioned before, the weather in Utah changes fast, and varies a ton. Over the three days of the class, we had fluctuations in temperature and wind. We had no rain or snow drop on us during the class, which was pleasant. On the first night of the class, temps were in the 30F area, so we were bundled up. On days 2 and 3, the temp floated from 30 degrees to 60. The cloud coverage and wind would really dictate that temperature, as it would get much colder when the clouds blocked the sun, and the wind picked up.
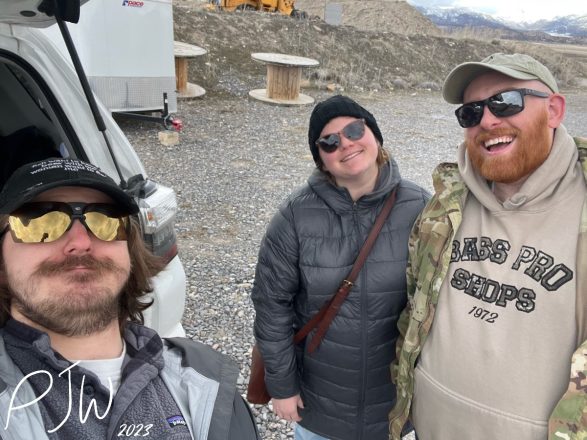
I would say that the clothing I brought was more than appropriate for me, as I never felt under or over clothed during the class. The hot hands certainly helped too. We all did get a lot of sun, so we applied sunscreen on the two full days of the class. This certainly was a smart choice.
Leading into the first day of the class, it was a cold evening, but we managed to stay warm. What happened on the first day?
Night 1 – Intros
The first night of the class ran from 6PM, to 9PM. We covered a fair bit, and I’ll try to express that here. However, this is not a cheat-sheet for the class, so go dish out the dosh and take it if you want the real experience.
At the start of the first night, we began with introductions. I always enjoy this, as it allows us to see the composition of the class. Our class was a lot of regular people, which is always great to see. People working in IT, medicine, package delivery and logistics, and more. From there, Cecil, Darryl, and Chuck gave their backgrounds too. All three instructors have a ton of real world experience, and this was extremely helpful, as they relayed stories throughout the weekend, of times that they used techniques that we were learning or covering.
Night 1 – Classroom Discussion
Once we cleared through introductions, we discussed the plan and timeline for the weekend. Darryl and Chuck would handle the live fire sections of the class, while Cecil performed the application of force/MUC interactions. Chuck would also handle an inert OC spray demonstration too, on Day 2. The big goal for the class was to prepare for the “most likely to happen” possibilities, opposed to the extremely corner cases.
During the first night, we covered the 4 rules of firearm safety. This is normally something that gets rushed through at other classes I’ve taken, but here, we discussed them, and their important applications in the real world. I really enjoyed this, as it is not discussed enough, but it is very important.
Following the safety discussion, we discussed the S.E.E. principle (similar to the OODA Loop). See, Evaluate, Eliminate is the acronym, and is a simple loop to follow. We need to take in information, evaluate it, and then “eliminate” the threat. Elimination can come in many forms, and does not always require deadly force. After SEE was discussed, we covered the elements that go into success with self defense interactions. A great degree of marksmanship, proper weapon handling and tactics, and a solid mindset need to be layered properly to have success.
From here, we went outside, and Darryl showed us various ready positions, and the positions we would be using during the class. The pros and cons of each position were discussed, and we used a proper low-low ready for most of the weekend. We also discussed a method of keeping the gun low, while maintaining a safe muzzle direction. Over the next two days, we’d be interacting with a lot of no-shoot and no-muzzle targets, so this was very much appreciated.
Day 2 – Live Fire Block 1
When we arrived bright and early for Day 2, we split into 2 groups. Ally and I were in group 1, so we got to do some live fire shooting first thing in the morning with Darryl and Chuck.
We began by loading up our pistols, and doing some drills at 3 and 5 yards. We did lots of headshots and body shots, with a few failure drills. Darryl lead the commands, and for a lot of us that shoot competition, it was a bit of a transition. As someone used to hearing “threat”, and that being the command to shoot, I had to slow down, and wait for a proper “fire” command. We began to use commands, such as “STOP”, or “GET BACK” before deploying force, which would be a good lead in for the force on force interactions over the weekend.
During the shooting, we made it a point to do administrative reloads as necessary. People generally put a ton of time into slide lock reloads, which is understandable, but the tactical/administrative reload should be trained too. Using the G48 with S15 mags, this was fairly easy to do. During the first string of drills, I fired about 30 rounds of 9mm. After about an hour of shooting, we switched to working with Cecil, and getting a rundown on MUC.
Day 2 – MUC Block 1
Once we headed over to our session with Cecil, we began with some classroom discussion. Cecil is a no-BS instructor, and he began our first block with him by explaining why he hates pithy gun-guy sayings. Stuff like “check your 6, make space, etc.”. I really like this, as so many people try to apply black and white rules to a very grey world. Cecil outlined that much of the self defense training sector lacks ambiguity, as real life is not super clear cut. Cecil also defined a few real world issues in regards to what we were training. Examples include that anyone can be the bad guy, and that people will get close to you in public. This was a good primer to what we would begin working on.
The biggest chunk of what we did with Cecil on both full days was learning MUC. Managing Unknown Contacts (MUC) was a lot of what we did over the two days. I won’t go into a ton of detail (go take the class), but we learned a lot about positioning, how to be squared up, and how to move without losing positioning.
A lot of the first block was getting comfortable with creating stronger positioning, while trying to maintain a conversation with our partners. We did this, as to try and make the process more deliberate, as stimuli will bombard you in the real world. After about an hour, we broke, and had our lunch break.
Day 2 – Lunch Break/OC Spray Demo
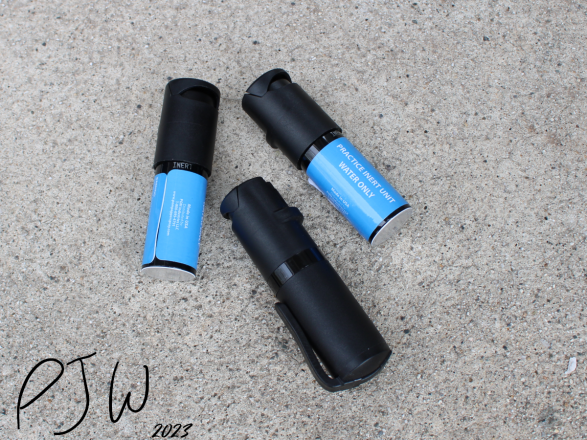
We scarfed down the food we brought, but it wasn’t completely a break. While we were eating, Chuck discussed OC/pepper spray, and how effective it can be in the specific role it holds. Chuck described the history of OC’s use over the years, and the brands that people should use, and avoid. General rule of thumb was to invest in OC that was lab tested, and to get some inert sprays so that you could practice using them.
Well, practice is what we then did! All of the students were given an inert bottle of POM OC spray, and we lined up across from each other. As a class, we took turns spraying each other, getting used to the spray distance, and how to aim the OC. We all had on proper eye protection, as even with the inert stuff, we didn’t want to hurt anyone. This was a fun, but very useful lunch break. After this session, we cleaned up, and returned to training.
Day 2 – Live Fire Block 2
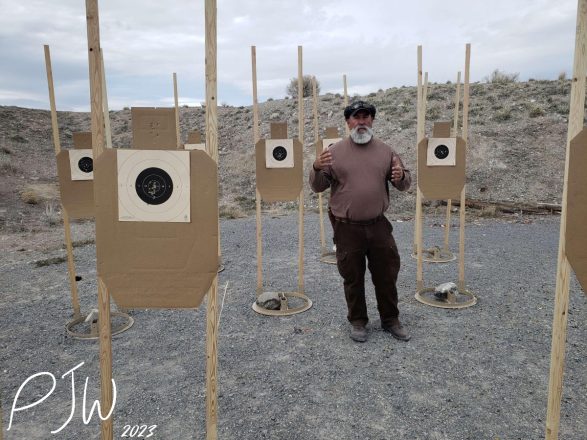
We rotated again, with my group going back to the live fire range. From here, we did modified El Presidentes, with “no-shoots” in front of, and behind the “shoot” targets. The classic El Pres is a drill I’ve shot a lot, but the twist here made it a different beast. Rather than just having a simple course of fire, we had to move to avoid muzzling, or shooting the no-shoots. While the actual mechanical shooting wasn’t extremely hard, all of the students needed to put in more brainpower to complete each run clean. My runs were clean, and I was content with that.
A twist that we did for this block was to involve the students with modifying the course of fire. While the shooter was facing away from the targets, the rest of the class would head downrange, and reorder the no-shoots. This lead to some interesting courses of fire, and more movement. Should you shoot in between two close no-shoots, or move to the side of them for a cleaner shot? Generally speaking, everyone shot fairly well, and had a fun learning experience. At the end of this block, I had fired about 50 rounds of 9mm for the entire day.
After about an hour of moving and shooting, we swapped, and headed back for Cecil’s second block of training.
Day 2 – MUC Block 2
Moving back to working with Cecil, we continued to build upon the skills we started working on in Block 1. We continued working on our positioning, in regards to the unknown contact encroaching towards us. Cecil guided us on adding in phrases, such as “get back, stay away, etc.”, as we built our better positioning. We would do polite “stay back”, a little more firm one, and then a final, loud command.
We began also a technique for keeping our hands naturally up near our faces, as to be able to react to a jab at the face, or a quick reaction to go for a weapon. With this, we also added in “pre-fight tells”. A lot of unknown contacts will give off cues before they strike, such as loading body weight, fiddling with their waistband, looking around, and face touching, for example. A lot of the info learned here was not groundbreaking per se, but was very intuitive to pick up. Hearing the concepts codified made learning and remembering them much, much easier.
By the point that we were finishing up our second block with Cecil, the second day of the NPE Counter Robbery class had come to a close. The class departed, and was slated to meet early on the following day.
Day 3 – Starting Off the Morning
We arrived around 8:30AM on the third day of the class. It was chilly, but not too bad. Once the rest of the students started arriving, we actually got into a few concepts before we split into our two groups for the day. These were all very basic, but important to keep in mind.
Chuck, Darryl and Cecil brought up transitional spaces. Essentially, a lot of violent crime happens in the places between the places people go. Parking lots, multi-story parking garages, gas stations, convenience stores, etc. The altercation won’t likely happen inside of the Wal-Mart, but that Wally World parking lot is a ton more likely.
We also learned about the “That Shit Ain’t Right” and “shark bump” ideas. “That Shit Ain’t Right” is a very easy to understand version of the “if there’s smoke, there’s fire” rule. Basically, if something seems like it ain’t right, it probably ain’t right. The “shark bump” is essentially just testing the waters. Would-be criminals will look for the easiest prey, and they will do the proverbial “shark bump” to test them. We want to be someone who doesn’t get pursued after a bump.
The last thing that was covered was normalcy bias. Essentially, we want to treat things how they seem. Hear a bang when you are in a grocery store? Don’t treat it like it could be fireworks, prepare for it to be something worse.
From this point, we split up into our groups, and went back to training.
Day 3 – Live Fire Block 1
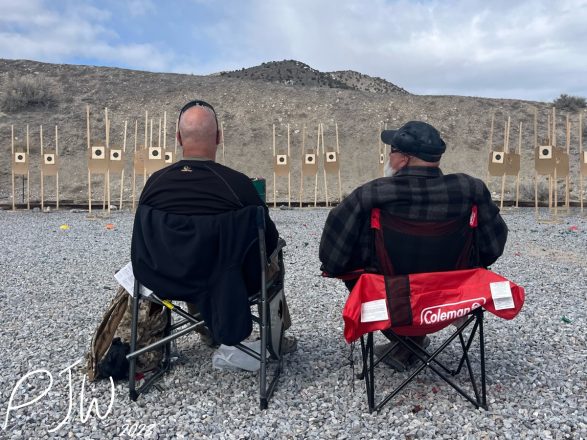
For the first live fire block on Day 3, Chuck and Darryl had us doing the “Screw Your Neighbor” drill. This drill was similar to the modified El Pres drills we ran the day before, but with more thinking. Here, there were indicators on the targets to tell us who to shoot, and how many times to shoot them. The same no-muzzle rules applied, and the class would change the order of targets for each upcoming shooter.
After a few “normal” runs of the drill, we began to find out why it is called the “Screw Your Neighbor” drill. On my second run of the drill, I turned around and began processing information. Upon looking, I saw that all 6 of my targets were all no-shoots. I ended up not drawing my gun, and that was a successful run of the drill. From here, we ended up doing a lot of strange target orientations, positioning, and various no-muzzle and no-shoot targets.
During this block, I felt like a lot of people were really feeling confident with thinking, and then utilizing their firearm if the situation called for it. For the shooting in this block, my total round count for the weekend went up to about 60 round of 9mm. Once we finished up this block, we swapped groups, and went to working with Cecil.
Day 3 – MUC Block 1
During our first block of training with Cecil on Day 3, we covered quite a bit. We began from where we had stopped the day prior, but added some more information into the mix. The idea of weapon access and weapon deployment came into focus, with the elements of a reactive vs. proactive deployment playing a factor. We also discussed the idea of “How far away is too close”, as in, “at what distance should we actually deploy a weapon”. Using the Tueller Principle, people tend to think that they have 7 yards to react to an assailant with a contact weapon. However, when you factor in lunging, arm length, and length to get a firearm to extension, 7 yards easily becomes less, and our “too close” is very much not far enough away.
From here, we began doing physical practicing with MUC, with now integrating in the inert OC from the day prior. During this stretch, a lot of people realized how hard it is to grab the OC can from a pocket, and deploy it. Weapon access was hard, which made deploying it extremely hard. A lot of us just ended up beginning with the OC in our hand, as this is something we’d likely do in the real world. With this, deploying the OC became much, much easier. We continued working on maintaining or making better positioning, creating distance when possible, and trying to give us more time to deal with a MUC.
This block with Cecil was a lot of “Oh, now I get it!” moments. I think that we all needed that, and it felt great doing it. We finished up after about an hour, and began our working lunch break.
Day 3 – Lunch Break/Gear Talk
During our lunch break, the instructors gave a talk about gear, and what they personally use in certain NPEs. While I won’t go into a ton of the specific info here, Darryl, Chuck, and Cecil have a ton of experience with working in NPEs, and that reflects their gear selections. Good ankle holsters and pocket holsters were discussed, clothing selection, and gun choice. Darryl broke out parts of his kit that he takes into no firearm NPEs, which was cool to see too.
If you want to see the full gear talk, you’ll have to take a class with these guys in the future. After our roughly hour long lunch, we returned to the more formal training.
Day 3 – Live Fire Block 2
The final block of live fire training was quite unique. For this drill, we were asked to use all of the skills we had been honing over the weekend, in a single scenario. All of the students were lead away from the range, while Chuck and Darryl set it up. We would be walked to the start point backwards, as to no be able to see what the arrangement was.
For my run of the drill, I was filling up gas at a crappy gas station, when my two friends came running out of the convenience store, with an unknown woman in tow. They told me that there was a pissed off guy chasing them, so I had to act. I deployed OC spray, and while assessing the situation, saw that there was a bad guy with a gun. I drew my gun, and shot him twice, and then fumbled for a second, as I saw a second potential guy holding a gun. Upon determination that he wasn’t a bad guy, I commanded him to drop his weapon. At this point, the drill was over.
I had fumbled a bit, as my brain wanted to go to OC again towards the end, but I managed to fight that urge and give commands. Generally, I was happy with my performance. Every student had a different scenario and run, with varying degrees of success. As the final rounds that I fired, my total 9mm expenditure for the class was 62 rounds. From here, we went back to finish up the day with Cecil.
Day 3 – MUC Block 2
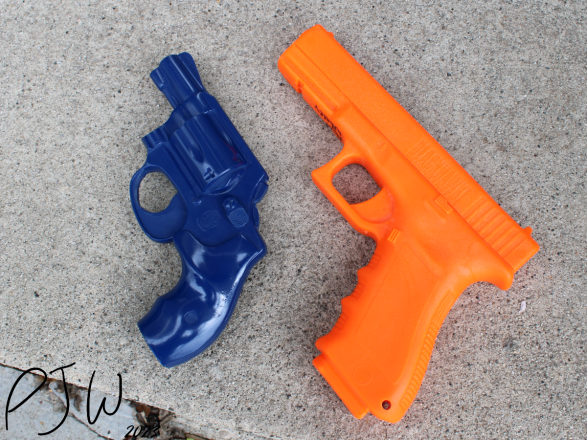
For the last block of the class, we began to use our dummy guns during our MUC encounters. We began by doing Cecil’s “Frankenstein” drill, where someone walks towards you while you have your dummy gun on them. We then have to decide when to start pulling our dummy gun in closer to our body, to have better retention on it. For most people, they realized that they needed to go to retention further out than they had thought prior.
From here, we began doing the previous MUC with encroachment encounters, but with accessing and deploying our dummy guns. Lots of us fumbled to get guns out, and some had more ease. This was certainly a culmination of our last two days of training, as all of the skills began to stack. During my interactions as the “good guy”, I found myself going for my pocket gun quite a few times. With being able to stage a hand on that gun a few seconds prior to needing it, my deployment speed was fast. However, having a hand in a pocket isn’t quite the same as lifting a shirt to show a gun, so this technique is more real-world applicable, depending on the situation. Regardless, I was happy with what I was doing right, and knew what I needed to improve.
Before we finished, Cecil showed us an “eye jab” technique that might be a way to buy a teeny bit of time. We tried this out on each other, albeit aiming for the chest, and not the eye. I caught a punch in the throat, but nothing serious. We finished up after this, and it was a great way to end the day.
NPE Counter Robbery Finale
After we had finished up, we gathered around, and discussed the class. Students were generally very happy with the outcomes and skills learned in the class, and the instructors enjoyed teaching it. We did a little plinking at the live fire range, as a way for students to try out other students’ guns. A few of the students tried out the Smith 442 and Ruger LCR I had brought, and I was happy to share.
Overall, the class seemed to be a strong success. What are my conclusions about it?
NPE Counter Robbery Conclusions
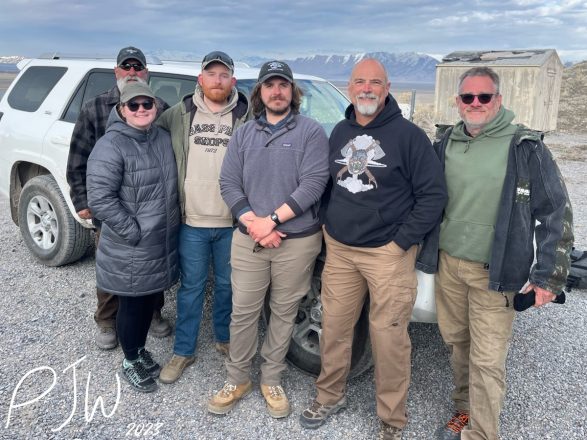
The NPE Counter Robbery, as taught by Cecil, Darryl, and Chuck was well worth the cost of entry. I learned a ton of skills throughout the weekend, and had a good time while doing it. I was content with my performance, both in regards to my live fire, and MUC sections. The gear I brought had performed well, and did not get in the way of the actions I tried to take.
I learned a lot about positioning, and the concept of MUC was a new, important thing to learn. After the class, I also ended up purchasing my own OC spray for carry, as this class made it a point that OC provides an avenue to take, rather than only having the gun as my self defense solution.
Cecil, Darryl, and Chuck have a ton of knowledge built from practice and experience, and that very much shows in the quality of the course. I’d recommend this class in a heartbeat, and am looking forward to more classes from them in the future.
Closing
I’d like to thank Tom for organizing the class, and getting the three excellent instructors out to Utah. I’d also like to thank Alex with The FARM, as the embedded FARM staff in the class.
If you’d like to take classes with the instructors, their contact links are down below:




Paul, thank you so much for your overview of this course. I signed up for this course next month, not even knowing what NPE Counter Robbery was all about. If Chuck and Darryl are teaching, I’m in. Had no clue who Cecil was. I started taking professional firearms classes in June 2018. I love to take ‘real’ classes, not just shooting at my range. If I am a bit nervous going into a class, then it’s the right class. All I can do is learn my limitations, and improve how I handle myself.
You have made me feel much less nervous about being qualifievd to take this class. This is real life situations that I need to learn how to handle.
Thank you so much.
Judy,
I’m glad that my AAR was able to help settle some of your nerves. The class is excellent, and I’m sure that you will learn a lot, but also have a very enjoyable time too. For the cost of the class, the return on investment is amazing.
Comment again after you’ve taken the class! I’d love to hear your feedback about your experience at the class.
Thanks for commenting! Take care!
Paul